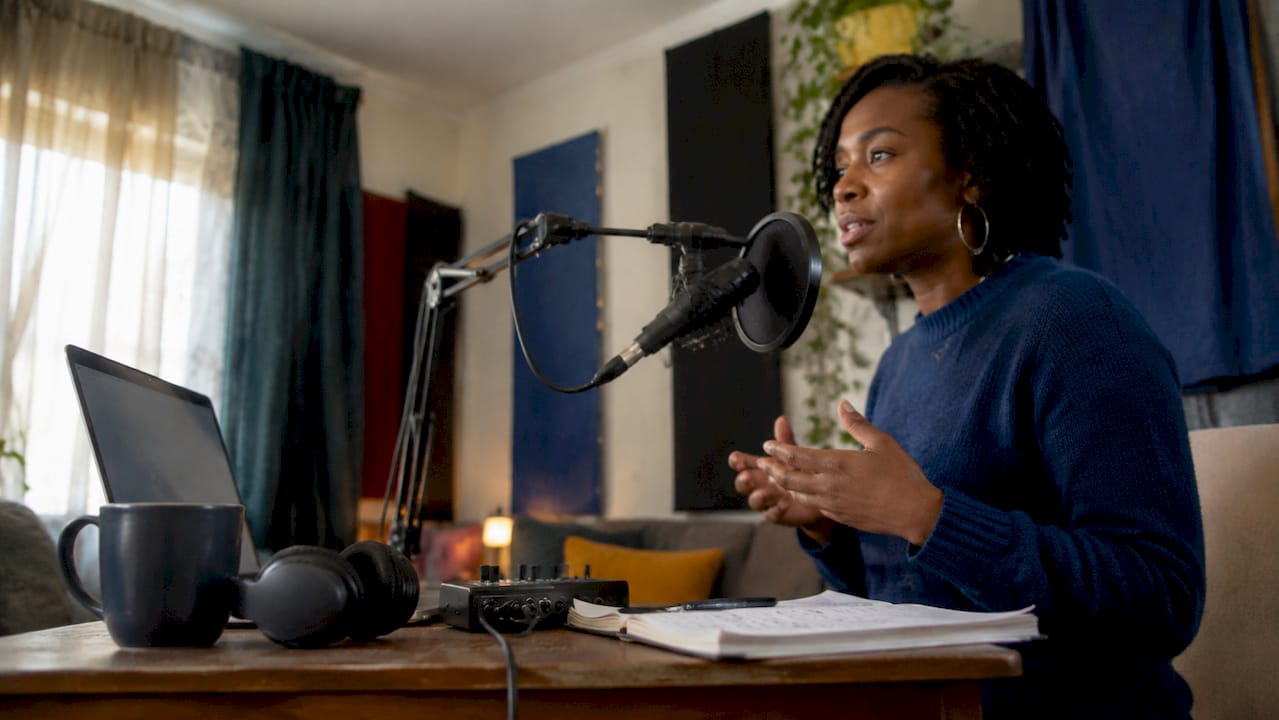
A spec voice over without studio access is fully achievable at broadcast quality when you control three variables: room acoustics, microphone placement, and self-direction workflow. Most independent creators assume a treated recording booth is the price of entry. It is not. Acoustic treatment and mic placement outweigh expensive gear for improving home voiceover quality. Tools like the Shure SM7B, moving blankets, and a disciplined pre-session routine can produce results that hold up against professional studio output. This guide covers every layer of that process, from gear selection to self-directing your own takes.
What equipment do you need for a spec voice over without studio?
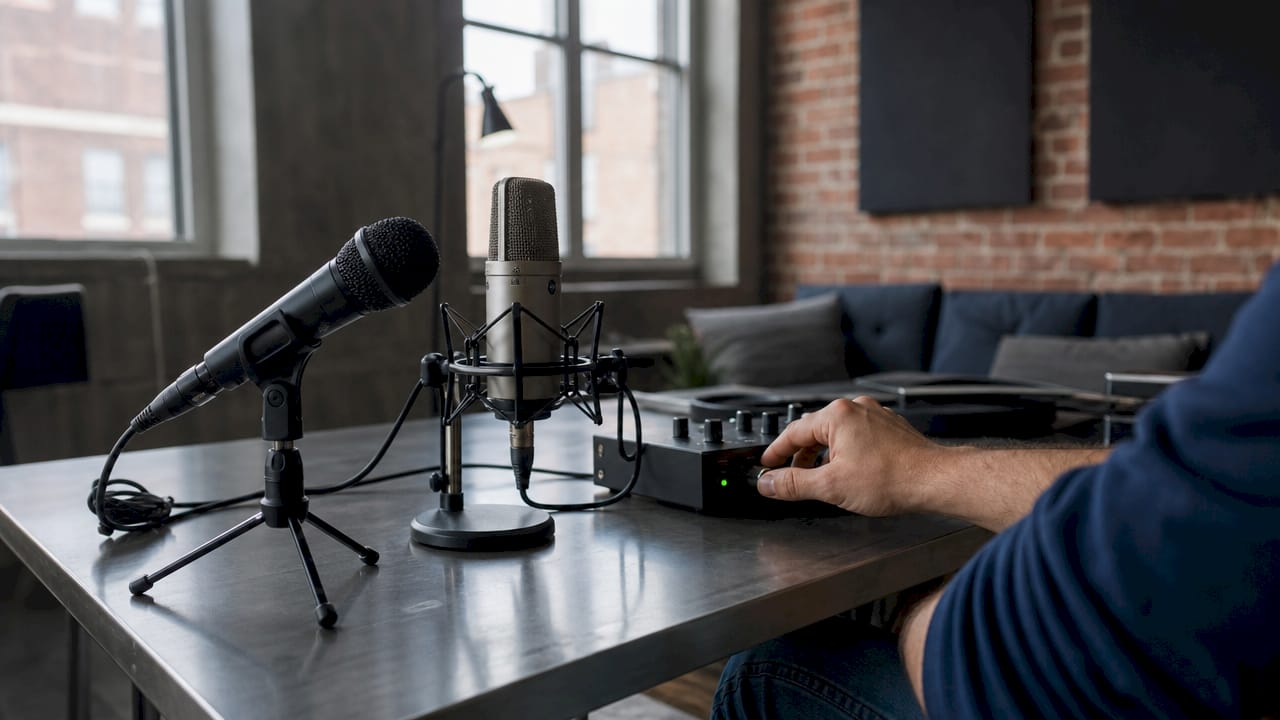
The minimum viable setup for home voice over recording costs less than most creators expect. Broadcast-quality home voiceover studios can be built for under $500 using moving blankets, quality headphones, and a modest microphone. That figure covers the four core components: a microphone, an audio interface, headphones, and basic acoustic treatment. Every dollar beyond that is a refinement, not a requirement.
Dynamic vs. condenser microphones for untreated rooms
Microphone choice shapes your recording more than any other single piece of gear. Dynamic microphones outperform condensers in untreated rooms because they reject off-axis noise and require closer placement. The Shure SM7B and Electro-Voice RE20 are the two most cited dynamics for this reason. Condensers like the Audio-Technica AT2020 capture more detail but also capture every reflection, air conditioner hum, and street noise in your space. If your room is untreated, a dynamic mic is the safer starting point.
Acoustic treatment on a budget
Room reflections define voiceover quality more than microphone brand. Hanging moving blankets on parallel walls breaks up flutter echo for roughly $60 to $80 total. Closets packed with clothing are a well-known DIY solution because fabric absorbs mid and high frequencies effectively. One critical warning: cheap foam panels absorb high frequencies while leaving low frequencies to resonate, making recordings sound boxy. For low-end control, thick mineral wool panels or purpose-built bass traps in room corners are the only reliable fix.
Pro Tip: Record a 30-second room tone sample before every session. Play it back through headphones to catch hum, HVAC noise, or reflections you have tuned out consciously.
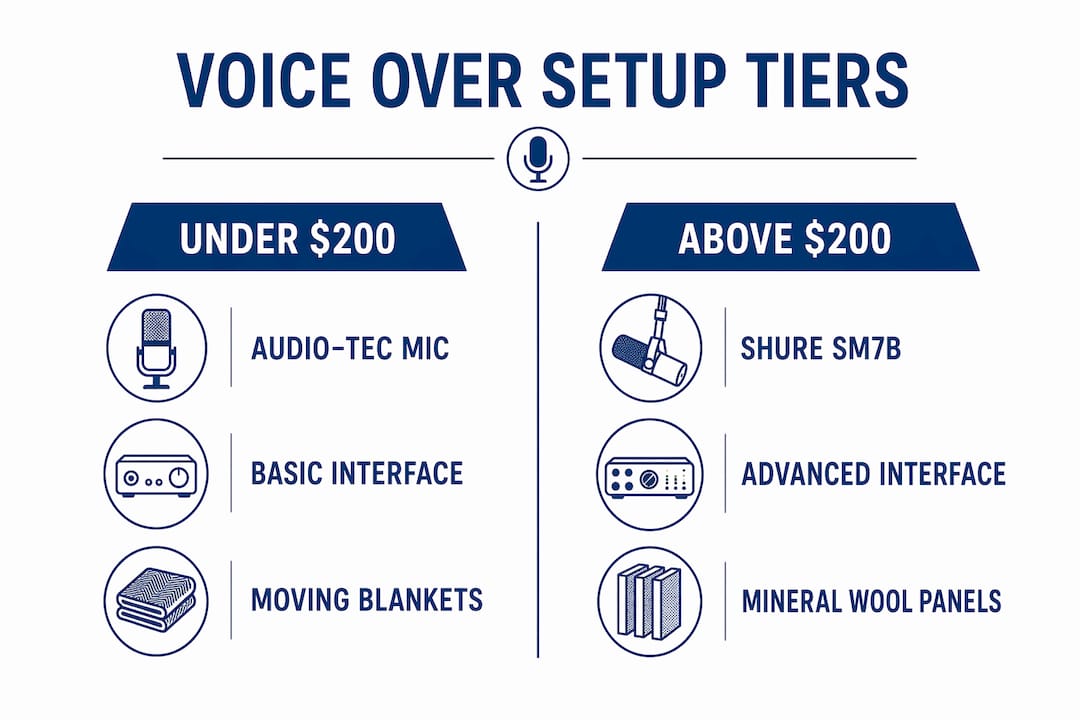
Here is a starter gear comparison by budget tier:
| Budget tier | Microphone | Interface | Treatment | Best for |
|---|---|---|---|---|
| Under $200 | Audio-Technica ATR2100x | Built-in USB | Moving blankets | First-time creators |
| $200 to $400 | Shure SM58 + Focusrite Scarlett Solo | Focusrite Scarlett Solo | Blankets + closet | Regular content producers |
| $400 to $600 | Shure SM7B | Focusrite Scarlett 2i2 | Mineral wool panels | Spec and commercial work |
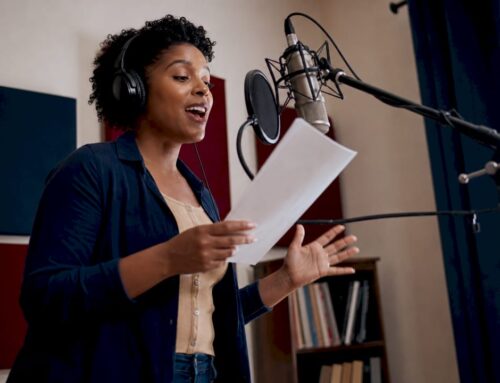
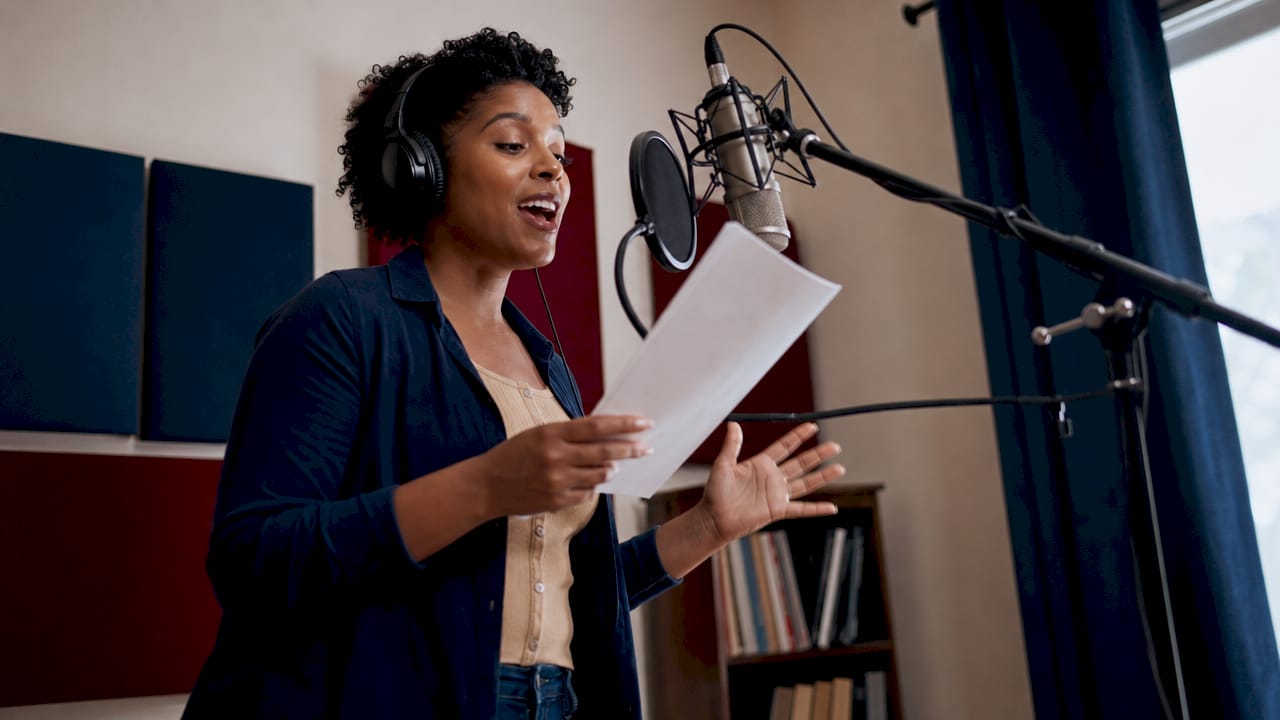
How do you position your mic for clean voiceover recordings?
Mic placement is where most DIY voice over from home setups fail silently. The recording sounds acceptable in headphones but falls apart in post-production or on client playback. Getting placement right from the start saves hours of editing.
- Set your distance. Maintain 6 to 10 inches between your mouth and the mic capsule. Closer than six inches exaggerates bass through the proximity effect. Farther than ten inches picks up room reflections that no software can cleanly remove.
- Angle the mic slightly off-axis. Pointing the capsule directly at your mouth amplifies plosive sounds on P and B consonants. Angling the mic slightly off-axis reduces plosives without losing vocal presence. A five to ten degree offset is enough.
- Position away from walls and room center. Placing the mic three feet from walls and away from the room’s center reduces comb filtering, which causes uneven frequency response across the recording.
- Set gain for peaks at -12 to -6 dBFS. Recording around -3 dBFS causes clipping and eliminates post-production flexibility. Aim lower to preserve headroom for editing, compression, and delivery normalization.
- Use a pop filter consistently. A pop filter placed two inches in front of the capsule catches air bursts before they hit the diaphragm. It also enforces consistent mouth-to-mic distance across takes, which matters when you are self-directing.
Pro Tip: Mark your mic stand position with tape on the floor after you find the right placement. Recreating the exact setup across sessions is faster than re-dialing everything from scratch.
How do you self-direct voiceover recordings remotely?
The biggest shift in recording without a studio is adopting both the performer and director roles simultaneously. Most voice actors trained in studios have someone else catching energy drops, pacing issues, and mispronunciations. When you record voice over from home, that responsibility falls entirely on you. A structured workflow is the only reliable substitute.
A practical pre-session routine runs like this:
- Vocal warmup for five to ten minutes. Lip trills, tongue twisters, and humming loosen the voice and reduce the flat, tight quality that shows up in cold recordings. The self-direction workflow recommended by VOTrainer starts here before any gear is touched.
- Mark your script. Use a printed or annotated digital copy. Mark breath points, emphasis words, and any phrases that need a specific tone. This prevents reading on autopilot, which is the primary cause of “announcer mode.”
- Record multiple deliberate variations. Do not record one take and move on. Record a conversational read, a warmer read, and a higher-energy read of every key section. Clients often cannot articulate what they want until they hear options.
- Slate your takes verbally. Slating takes clearly by saying “Take 1, conversational” before each recording keeps your session organized and makes client communication faster when delivering files.
- Review takes as a director, not a performer. After recording, step away for two minutes. Then listen back through headphones with the script in front of you. Evaluate energy, pacing, and technical quality separately. Catching a performance issue and a noise issue in the same pass leads to missed problems.
Physical movement and visualization during recording prevent stiffness and improve vocal expressiveness. Standing rather than sitting, gesturing naturally, and imagining a specific real person you are speaking to all produce measurably more natural performances in solo sessions.
Pro Tip: Record a “throwaway” take at the start of every session where you read the first paragraph casually, as if telling a friend about it. This loosens performance habits before the real takes begin.
How do you troubleshoot common home voiceover problems?
Even a well-planned no studio voice over setup produces problems. The key is diagnosing issues by category rather than guessing at solutions.
Room echo and low-frequency buildup are the two most common complaints. Echo appears as a slight reverb tail on consonants. Low-frequency buildup causes a boomy, muddy quality that moving blankets cannot fix. Thick bass traps in corners are the only reliable solution for low-end control in untreated spaces.
Clipping and inconsistent levels usually trace back to gain staging errors. If your waveform shows flat tops on peaks, your interface gain is too high. Drop the gain until peaks sit between -12 and -6 dBFS and re-record. Do not try to fix clipped audio in post-production. It cannot be recovered.
Noise reduction software overuse is a subtler problem. Tools like iZotope RX should be used sparingly. Overprocessing creates an unnatural “watery” artifact that signals amateur post-production to any experienced listener. The correct approach is to fix the source problem acoustically rather than relying on software to clean it up.
Here are the most common issues and their fixes:
- Boxy or muffled sound: Thin foam panels absorbing highs but not lows. Replace with mineral wool or reposition to a more furnished room.
- Inconsistent tone across sessions: Mic position is shifting. Use floor tape marks and a consistent stand height.
- Background hum: HVAC or refrigerator noise. Record during off cycles or move to a different room temporarily.
- Plosive pops: Pop filter missing or mic is on-axis. Angle the capsule slightly and add a pop filter.
- Hollow or echoey sound: Recording too close to bare walls. Move mic three feet from walls and add absorption behind the recording position.
Pro Tip: Send a 10-second test clip to a trusted colleague or client before committing to a full session. Fresh ears catch problems your own ears have normalized.
Key takeaways
Spec voice over without a studio succeeds when acoustic treatment, mic placement, and a disciplined self-direction workflow are treated as equally important as the gear itself.
| Point | Details |
|---|---|
| Room acoustics over gear | Treating reflections with moving blankets or mineral wool matters more than buying an expensive microphone. |
| Dynamic mics for untreated spaces | Shure SM7B and Electro-Voice RE20 reject off-axis noise better than condensers in non-studio rooms. |
| Gain staging discipline | Record peaks at -12 to -6 dBFS to preserve headroom and avoid unrecoverable clipping. |
| Self-direction workflow | Slate takes, record deliberate variations, and review as a director after stepping away briefly. |
| Conservative noise reduction | Use iZotope RX sparingly. Fix acoustic problems at the source rather than in post-production. |
What I have learned from years of recording without a traditional booth
The most common mistake I see independent creators make is spending money before solving the room. A $400 microphone in a bare-walled bedroom sounds worse than a $100 dynamic in a closet full of clothes. The physics are not negotiable. Spend your first $80 on moving blankets, not a new mic.
The second lesson is harder to accept: self-direction requires more discipline than performing for a director. When no one is watching, it is easy to accept a mediocre take because it is technically clean. I keep a simple checklist on my desk: energy, clarity, and connection. Every take gets evaluated on all three before I move on. If one is missing, the take does not make the cut, regardless of how clean the audio is.
Budget voice over options have never been more capable. The gap between a well-executed home recording and a professional studio recording has narrowed to the point where most listeners cannot identify it. What they can identify is a flat, disconnected performance. Invest in your craft and your room before you invest in gear.
Work with a professional voice actor for your next project
When your project needs a voice that connects rather than just reads, Gregeschmeyervoice delivers the grounded, conversational quality that audiences respond to. Greg Eschmeyer’s work spans commercials, political messaging, documentaries, and broadcast, with a track record of fast turnaround and performances that match specific project tone. Whether you are producing spec content or a full campaign, the difference between adequate and memorable often comes down to the voice. Explore demos, review client testimonials, and book your next project directly at Gregeschmeyervoice.com.
FAQ
What is a spec voice over without studio access?
A spec voice over without studio access is a demonstration recording produced in a home or improvised space to showcase vocal performance for potential clients or casting. It uses controlled acoustic treatment and proper mic placement to achieve broadcast-acceptable quality without a professional recording booth.
What microphone works best for home voice over recording?
Dynamic microphones like the Shure SM7B or Electro-Voice RE20 work best in untreated rooms because they reject off-axis noise and room reflections more effectively than condenser microphones.
How much does a DIY voice over setup cost?
A functional home voiceover setup costs under $500, covering a dynamic microphone, an audio interface like the Focusrite Scarlett Solo, Sony MDR-7506 headphones, and moving blankets for acoustic treatment.
How do you avoid “announcer mode” when self-directing?
Mark your script for emphasis and breath points before recording, then imagine speaking to one specific real person rather than an audience. Recording a casual throwaway take at the start of each session also loosens performance habits before the real takes begin.
Can noise reduction software fix a bad recording environment?
Noise reduction tools like iZotope RX can reduce background noise but should be used sparingly. Overprocessing creates unnatural audio artifacts that signal poor production quality. Fixing the acoustic environment at the source always produces better results than software correction.